Setting Up MkDocs with Material Theme on Linux Mint
A step-by-step guide to creating a professional documentation site using MkDocs and GitHub Pages.
📋 Prerequisites
- Linux Mint installed
- GitHub account
- Terminal access
- Visual Studio Code
- Python
1. Install git and github cli
- Open terminal and input:
2. Set up a new mkdocs project
3. Create a virtual environment
- Open Visual Studio Code
- Open new terminal inside Visual Studio Code
4. Install pip
5. Install mkdocs and the material theme
6. Customize your mkdocs.yml
- Set attributes
site_name, theme, palette, font, favicon, and more - Find detailed customization information here
- Add Markdown extension for Visual Studio Code compatibility:
7. Preview your site locally
mkdocs serve
* View in browser at: http://127.0.0.1:8000
8. Push to github and deploy
git init
git remote add origin https://github.com/<your-username>/my-new-docs.git
git add .
git config --global user.email "you@example.com"
git config --global user.name "Your Name"
git commit -m "Initial commit"
git push -u origin main
mkdocs gh-deploy
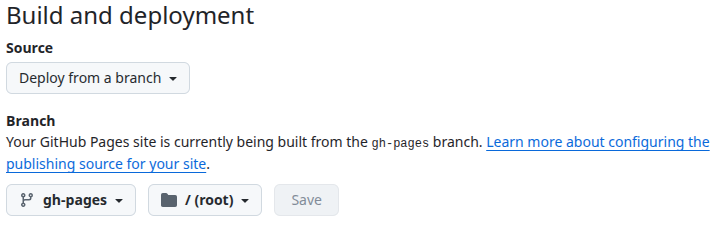
9. Enable github pages
- Go to repo ⚙ Settings → Pages
- Set branch to
gh-pages, root folder, and saveBelow is what your GitHub Pages settings should look like:
Success!
- Your site should be available at:
https://<your-username>.github.io/my-new-docs/
Don't Forget to Deploy
- After updating
.mdfiles runmkdocs servefor local updates. - For public updates run the following:
- ⏱️ Note public updates can take 1-3 minutes to apply.
Additional Resources
- MkDocs User Guide
- MkDocs Material Theme Docs
- GitHub CLI Manual
- Material for MkDocs: Full Tutorial To Build And Deploy Your Docs Portal